Make Stencils and Molds with a Die Cutter
I have seen jewelry made with acrylic shapes and thought, wouldn't it be nice to make my own? So I set out experimenting. I rolled out some Amazing Mold Putty into a flat sheet and ran it through my die cutter using a thin cut die.... It was too thin to cut through the AMP. So then I made a thinner sheet of AMP and tried again....still to thick. Starting to feel like Goldilocks, I tried one more try. This time I used a standard (deeper) die and it was just right!

The shapes I chose were a fleur de lis and Eiffle tower. Make sure you work over a Teflon sheet (AMP sticks sometimes to the silicone sheets).
Now that I know the magic formula (really just using a deep die), I am ready to being.
Start with AMP- ready to cast a mold. Instead roll out flat and rather thin, but not too thin because it will tear. I made mine about the thickness of a quarter. This project using Amazing Clear Cast resin.
Cut in your die cutter using an original Sizzix or Accucut die. Do not try with a wafer thin die, they are not deep enough to cut through the AMP.
There are few ways you can go from here.
- Packing Tape Method-Place packing tape on the back of the mold.
- Direct to Teflon- Pour resin in directly on the Teflon sheet
- Place decorative paper under mold and pour resin on top of it..

Packing Tape method- I had high hopes for this type, but the bare tape back wrinkled and didn't allow for an even coat of resin. Maybe I will try again at another date. Perhaps filled with charms.
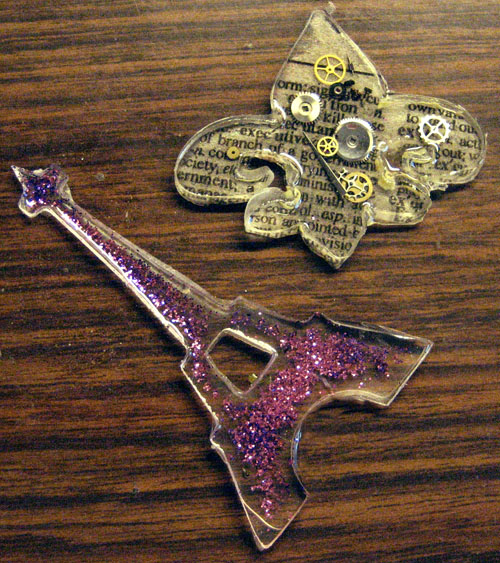
Direct to Teflon- This one worked great! There was a little seepage but the resin was so thin that it peeled off rather easy. The areas that didn't peel off cut easy with scissors. I also just placed back the inside piece from the die.


Sprinkle a little glitter and now we have a party!
Paper Backing- This is my favorite. I placed a book page under the mold (all on top of the Teflon sheet) and poured in the resin. It seeped too but the resin spread (wicked) when it hit the paper and it was super easy to trim up. I then started dropping watch parts inside.
After you remove the resin from the mold you may see you have a lip. You can mix up a little more resin and top it off. Be VERY CAREFUL, never fill it up to the top. When I filled it up exactly the the top, when I came back to check on it, it was all over the place. So leave yourself a little wiggle room.
Now I just have to figure out what to make with these!
What will you make with Die Cut Molds?

Comments